Introduction
Aim of this webinar is to show developers how they can implement design changes in X-Cart 5. The webinar consists of 6 typical tasks and I will explain how approach them. Besides that, the webinar introduced Custom Skin and Webmaster Kit modules that will be helpful for X-Cart 5 developers.
Video
Webinar process
1. How can I hide the Powered by label?
Although, we really appreciate when merchants proudly state that they are using X-Cart 5, we understand that some merchants do concern about security and do not want let malicious users any bit of info about their stores. There are several ways how you can hide Powered by label from the store-front.
1.1. Via Custom CSS section of ThemeTweaker module
This is the simplest way. It has its downsides though. The info about your store's version will be still in the HTML source code.
Go to the System settings > Look & feel > Custom CSS section in your admin area and define the following CSS code there:
.powered-by .powered-by-label {
  display: none;
}
1.2. Via your own CSS file
This is similar way to what I have described earlier. The only difference is that you do not need ThemeTweaker module in order to apply the change.
Create your own module or enable default CustomSkin (XC/CustomSkin) one. I will be using CustomSkin in my example. The same approach will work for custom module as well, you will only need to adjust namespaces in PHP scripts.
Create the View/AView.php script inside your module with the following content:
<?php

namespace XLite\Module\XC\CustomSkin\View;

class AView extends \XLite\View\AView implements \XLite\Base\IDecorator
{
    public function getCSSFiles()
    {
        $list = parent::getCSSFiles();

        $list[] = 'modules/XC/CustomSkin/css/css.css';

        return $list;
    }
}This code simply defines that skins/default/en/modules/XC/CustomSkin/css/css.css file must be included into every page.
Finally, we need to create this CSS file and we create it with the following content:
.powered-by .powered-by-label {
  display: none;
}Rebuild the cache and check the results.
1.3. Via overriding template in CustomSkin module
Although this method is more complex than ones above, it allows you to completely remove Powered by text from HTML source code.
Make sure that Custom Skin module is enabled.
Also enable Webmaster Kit module and make sure that the Mark templates option is On in its settings. For more details please refer to the video at around 11:14.
Using Webmaster Kit, find the template responsible for displaying Powered by label. Watch video for more thorough instructions. You will find out that needed template is skins/default/en/powered_by.tpl.
Copy this template to the skins/custom_skin/default/en/powered_by.tpl one.
Its code is:
<div class="powered-by">
<p class="copyright">© {getCompanyYear()} {config.Company.company_name}. {t(#All rights reserved.#)}</p>
<p class="powered-by-label">{getMessage():h}</p>
</div>and you need to remove the following part:
<p class="powered-by-label">{getMessage():h}</p>Save the results and reload the page in order to see the results. You do not need to rebuild cache.
2. How can I wrap the <div id="content"> on home page into <div id="homepage">?
2.1. By overriding template
First step is to find what template contains the
<div id="content">. The thorough explanation of how you can do it using Webmaster Kit module is given in video at ~18:00.We can see that the skins/default/en/layout/main.center.center.tpl template contains this
<div id="content">and we can apply the approach described in section 1.3 in order to change it.Copy the main.center.center.tpl template to skins/custom_skin/default/en/layout/main.center.center.tpl . It should have the following content:
<div id="content" class="column">
  <div class="section">
    <a id="main-content"></a>
    <widget template="center.tpl" />
  </div>
</div>Change this new file and wrap this code into
<div id="homepage">, so it would become:<div class="homepage">
<div id="content" class="column">
<div class="section">
<a id="main-content"></a>
<widget template="center.tpl" />
</div>
</div>
</div>Reload the page in your browser and check the results.
2.2. By PHP code
Although, the approach shown above is easy, it has its downsides. If future version of X-Cart changes the skins/default/en/layout/main.center.center.tpl template, then this change will not affect your store after you upgrade to this new version. The proper way to write your mod is to keep using default templates instead of overriding them.
Change the Main.php script of the XLite/Module/XC/CustomSkin module (as usual you can use your own module instead of existing XC/CustomSkin one) and add a new method there as follows:
public static function runBuildCacheHandler()
{
    parent::runBuildCacheHandler();

    \XLite\Core\Layout::getInstance()->removeTemplateFromLists('layout/main.center.center.tpl');
}This method unassigns layout/main.center.center.tplfrom all view lists.
The next step is to assign a custom template to the same view list and call layout/main.center.center.tpl inside this custom template.
Before next step please do not forget to remove the skins/custom_skin/default/en/layout/main.center.center.tpl template mentioned in section 2.1.
Create the skins/default/en/modules/XC/CustomSkin/main.custom_center.center.tpl template with the following content:
{**
 * @ListChild (list="layout.main.center", weight="200")
 *}

<div class="homepage">
    <widget template="layout/main.center.center.tpl" />
</div>This code assigns this new template to layout.main.center view list, - the same view list where layout/main.center.center.tpl was - adds
<div id="homepage">wrapper and calls the initial template.Rebuild the cache and check the results.
3. How can I change the logo depending on the selected language? Logo image should be defined as a language variable
Override the skins/default/en/layout/header.logo.tpl template with the skins/custom_skin/default/en/layout/header.logo.tpl one as described earlier (section 2.1, section 1.3)
Define the code of this new template as follows and save the results.
<div id="logo">
  <a href="{buildURL()}" title="{t(#Home#)}" rel="home"><img src="{t(#skins/default/en/images/logo.png#)}" alt="{t(#Home#)}" /></a>
</div>The most important part here is that if you put any text between t() construction, then it can be translated via admin area.
Go to the Store setup > Translations > Edit labels > Your language > Add new label section in admin area and define the new URL for logo in other language (e.g. German) as shown on the snapshot below:
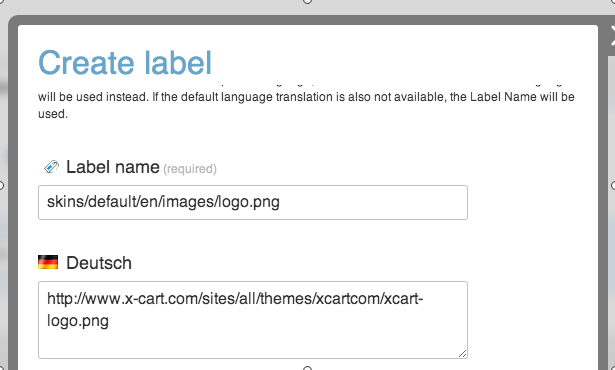
After you click Save changes button, the logo for German part of your store will be replaced with X-Cart logo as per definition above.
4. How can I replace the menu added by SimpleCMS with my own menu?
First step is to find out what template and viewer manages the display of SimpleCMS menu. You can do it using Webmaster Kit module. Watch video at around 33:25 for more details.
You will find out that this template is skins/default/en/top_menu.tpl and viewer is XLite/View/Menu/Customer/Top.php. This viewer defines the method defineItems() that returns array with menu labels and their URLs.
In order to replace the menu, you should alter this viewer and put your own items into it. The similar approach is used by the SimpleCMS module when classes/XLite/Module/CDev/SimpleCMS/View/Menu/Customer/PrimaryMenu.php class decorates the XLite/View/Menu/Customer/Top.phpviewer.
In order to apply this change, you should create two files in the XC/CustomSkin module: classes/XLite/Module/XC/CustomSkin/View/Menu/Customer/Top.php, classes/XLite/Module/XC/CustomSkin/View/Menu/Customer/TopAfterSimpleCMS.php.
I am using CustomSkin module just for an example. You can use your own module. Do not forget to update namespaces, in case you are using your own module.
**classes/XLite/Module/XC/CustomSkin/View/Menu/Customer/Top.php** script will have the following content:
<?php

namespace XLite\Module\XC\CustomSkin\View\Menu\Customer;

class Top extends \XLite\View\Menu\Customer\Top implements \XLite\Base\IDecorator
{
    protected function getMyItems()
    {
        $return = array();

        $return[] = array (
            'url' => 'http://google.com',
            'label' => 'Google menu',
            );

        return $return;
    }

    protected function defineItems()
    {
        return $this->getMyItems();
    }
}Method getMyItems() defines what items must be put into the menu and we call this method inside defineItems() method.
classes/XLite/Module/XC/CustomSkin/View/Menu/Customer/TopAfterSimpleCMS.php script will have the following content:
<?php

namespace XLite\Module\XC\CustomSkin\View\Menu\Customer;

/**
 * @LC_Dependencies ("CDev\SimpleCMS")
 */

class TopAfterSimpleCMS extends \XLite\View\Menu\Customer\Top implements \XLite\Base\IDecorator
{

protected function defineItems()
    {
        return $this->getMyItems();
    }
}The most important part here is the
@LC_Dependencies ("CDev\SimpleCMS")construction. It tells X-Cart that the decoration described in this script must happen only when SimpleCMS module is enabled. If we did not have this script, we would not be sure what module (CustomSkin or SimpleCMS) would decorate viewer XLite/View/Menu/Customer/Top.php last, but we need to be sure that this decoration will happen after SimpleCMS module. On the other hand, we cannot have only this viewer, because if SimpleCMS module is not enabled, then the decoration described in this file will not happen as well.Rebuild the cache and check the results. You should only have one entry in top menu: Google menu.
5. How can I hide the category block from the home page and keep it on other pages?
Using Webmaster Kit, find the viewer that manages display of category block on home page. It will be classes/XLite/View/TopCategories.php one.
Decorate this class by creating the classes/XLite/Module/XC/CustomSkins/View/TopCategories.php script with the following content:
<?php

namespace XLite\Module\XC\CustomSkin\View;

class TopCategories extends \XLite\View\TopCategories implements \XLite\Base\IDecorator
{
    protected function isVisible()
    {
        return parent::isVisible() &&
            \XLite\Core\Request::getInstance()->target != 'main';
    }
}Of course, you can use your own module here. CustomSkin one is used just for an example.
As you can see, we are adding an extra condition to the method isVisible() that defines whether category block is shown. If you are on home page (target=main), then this block will not be shown.
Rebuild the cache and check the results.
6. How can I define the default view for products as Table/List instead of Grid?
Create the classes/XLite/Module/XC/CustomSkin/View/ItemsList/Product/Customer/ACustomer.php file with the following content:
<?php
namespace XLite\Module\XC\CustomSkin\View\ItemsList\Product\Customer;
abstract class ACustomer extends \XLite\View\ItemsList\Product\Customer\ACustomer implements \XLite\Base\IDecorator
{
    protected function defineWidgetParams()
    {
        parent::defineWidgetParams();

        $this->widgetParams[static::PARAM_DISPLAY_MODE] = new \XLite\Model\WidgetParam\Set('Display mode', static::DISPLAY_MODE_TABLE, true, array());
    }
}Of course, you can use you own module instead of CustomSkin. I am using this one just for an example.
Rebuild the cache and check the results.
Questions & answers
Can the Webmaster Kit usage be IP-restricted?
At this point, we are not planning it, because only admins can see the debug console while module is enabled. Customers will not ever see it. Besides that, we assume that Webmaster Kit module will never be used on production stores.
Design changes do not need cache rebuilding, is this because developer mode is turned on in config.php?
Yes.
How to create new separate skin from scratch?
This process will be covered by a special article in the future. Stay tuned for updates!
Can someone else's mod overwrite our changes?
Yes. X-Cart 5 designed in a way that every mod can overwrite every other mod. It is powerful feature to have, especially when you are writing a complete project or need your mod to be compatible with other one. Of course, there might be collisions between modules, but we are monitoring the situation and if it happens, we will find a solution based on the situation.
How is TopMenu loaded after SimpleCMS menu?
It was loaded after SimpleCMS because of the @LC_Dependencies construction used. Check the point 6 in the section 4.
Why v5 is better than v4 if the skin overwrite is not easily upgraded? Isn't this exactly what v4 is?
You can use approach described in the section 2.2 in order to overcome problems with skin upgrade. You do not have such option in X-Cart 4.
How to add that <div id="homepage"> to the homepage only, not store wide?
In this case, you need to add a condition similar to one described in section 5. According to this condition, you will either display <div id="homepage"> or not.