Translation module is an addon that translates an X-Cart store to another language. It is the same thing that we call a language package, a translation package or, sometimes, simply a translation.
The better part of a translation module is not code, but a list of translated text labels. We tried to ease things for translators as much as possible, so all they need to do is to perform their translating job. After that you can run a special script that will wrap up their translation into a translation module.
This article describes the whole process of creating a translation module.
Getting a CSV file
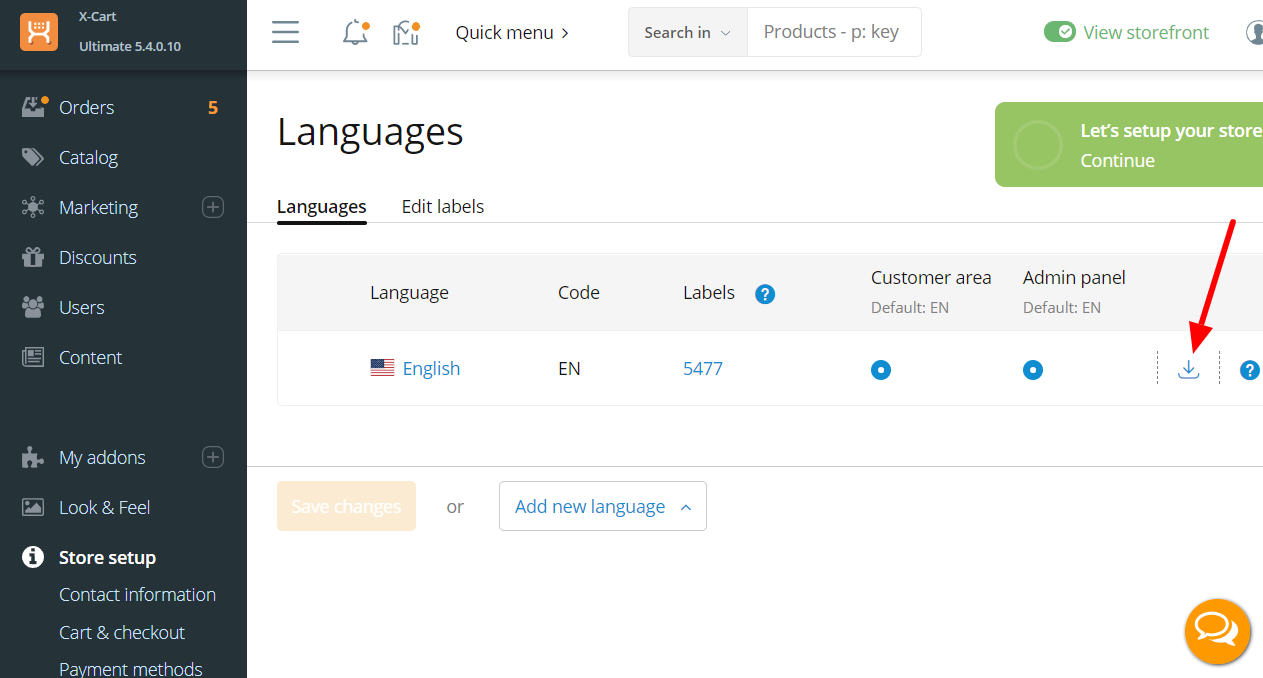
We assume that you already have an X-Cart 5 installation. You can get the complete list of labels for translation by clicking on the Download CSV icon in the Store setup > Translations section in your X-Cart store Admin area.

Working with CSV
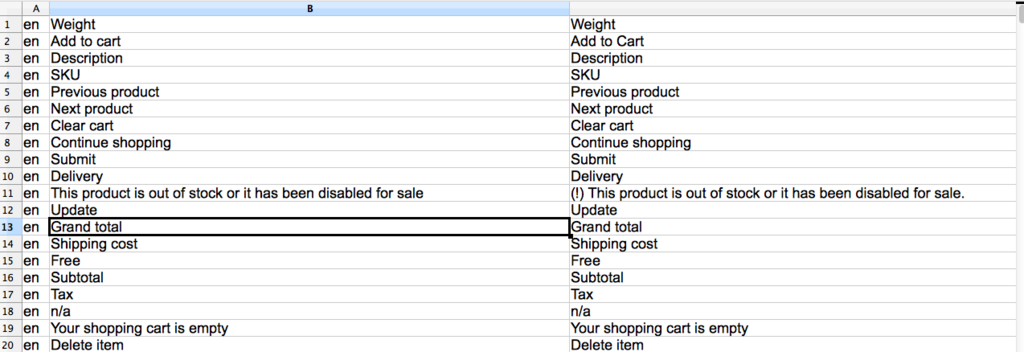
Open this CSV file in your favorite spreadsheet editor (MS Excel, OpenOffice Calc, etc). You will see three columns there.

- The first column contains the code of the English language. Remove this column completely.
- The second column contains the key of the label. Our translation engine will use this key to identify what label should be pulled from the translation module. Do not change the contents of this column.
- The third column contains the translation of the label. You will need to replace the contents of this column with your translation.
Example
For example, you want to add a Spanish language translation for your X-Cart store. Follow the steps below:
- Open the CSV file you have downloaded from your X-Cart store in the spreadsheet editor.
- Delete the first column. As a result, you will have two columns (the 1st one that used to be the 2nd one and the 2nd one that used to be the 3rd one).
- Translate the values in the 2nd column. Be sure to work on the 2nd column only! On the first row, remove the word Weight and add a Spanish translation of the word Weight in its place. On the second row, remove the phrase Add to Cart and replace it with a Spanish translation. Note that you are still supposed to be working on the 2nd column, so make sure you are adding your translation in the place of the phrase Add to Cart in the second column, NOT the phrase Add to cart (with the small letter "c" in "cart") in the first column, which is the key for this label and is not supposed to be changed. Note that quite often the key of a label is the same as its translation, but that is not always. Keep translating the labels until the end of your file.
- Save the file with the CSV extension.
Wrapping up the translation module
Once you are done translating the second column of your CSV file, go to the page https://market.x-cart.com/create-translation-module-by-using-csv-file/. This page provides access to a script that will help you to wrap up your CSV file into a translation module.
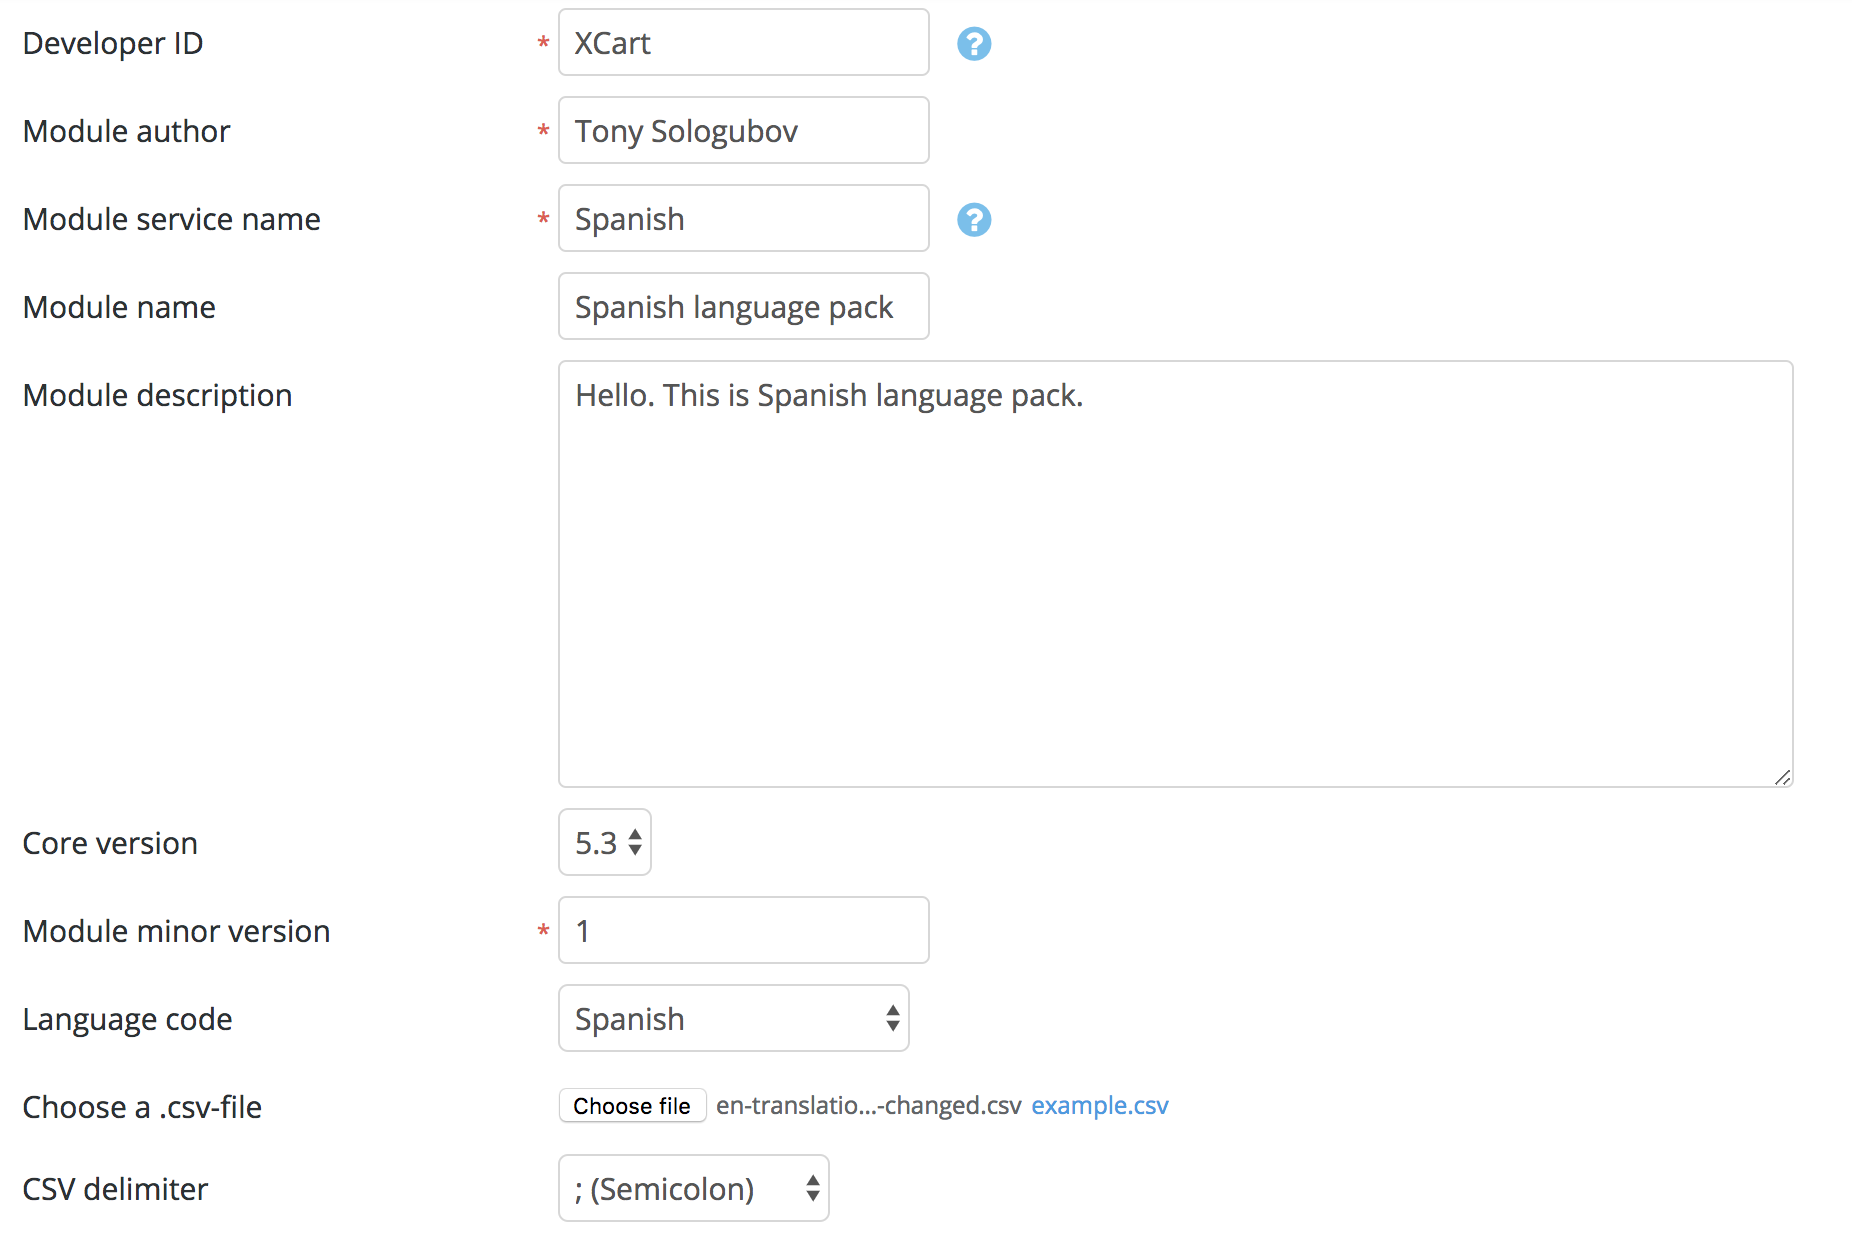
You will need to complete the form provided on the page. We will require that you provide the following information:
- Developer ID: Your developer ID (without spaces).
- Module service name: The ID of your module in X-Cart.
- Module author: The name of the translation author as it needs to be displayed to merchants.
- Module name: The name of your module as it is going to be displayed to merchants.
- Module description: The description of the module that will be displayed to merchants.
- Core version: The X-Cart version for which your module is intended.
- Language code: The language into which your module provides a translation.
- Choose a .csv-file: The CSV file that needs to be uploaded and converted into a translation module.
- CSV delimiter: The type of delimiter used in your CSV file: comma, semicolon or tab.
- CSV charset: The character encoding used in your CSV file. If you did not change it, keep the default setting "UTF-8".
- Choose a .png-file: The image that you want to use as your module logo.
- Version changelog: A changelog is required for every new version of an already published translation module. You can leave this field blank if you are preparing the very 1st version of your translation module.
Once you are done, click the Create button. This will launch the script to create a module for you.

Possible problems
Fatal error during module installation
If you forget to remove the first column with the language code (e.g. en) from the CSV file, you will see the error message on the 7th step of the module installation.
To fix this problem, remove the first column, so your CSV file will have only two columns remaining and pack the module again.