Introduction
This article describes how developers can create a new page in X-Cart. For instance, we want to create a page in admin area (admin.php?target=tony_custom) that will show some specific information. This guide explains how to achieve this task.
Before get started
First thing to do is to create an empty module. We are creating a module with developer ID Tony and module ID PageDemo.
Creating page in admin area
For the sake of example, our task is to create the page which will be available at admin.php?target=tony_custom address and will display Hello world! text.
Create new controller class. Since we want our page to be opened at
admin.php?target=tony_custom, the controller class must be named TonyCustom. If you need more info about how controllers work in X-Cart, look at Controllers article.We create the
classes/XLite/Module/Tony/PageDemo/Controller/Admin/TonyCustom.phpfile with the following content:<?php
namespace XLite\Module\Tony\PageDemo\Controller\Admin;
class TonyCustom extends \XLite\Controller\Admin\AAdmin
{
}As you can see, it is pretty empty, but since no data should be processed from the request, we do not need any extra methods here.
Create new viewer class that will manage the data output. This viewer class should sit in the
classes/XLite/Module/Tony/PageDemo/View/Page/Admin/directory and have the same as controller class. This is just an agreement and all page viewer classes follow the same principle. We are creating theclasses/XLite/Module/Tony/PageDemo/View/Page/Admin/TonyCustom.phpfile with the following content:- 5.2.x and earlier
- 5.3.x
<?php

namespace XLite\Module\Tony\PageDemo\View\Page\Admin;

/**
 * @ListChild (list="admin.center", zone="admin")
 */

class TonyCustom extends \XLite\View\AView
{
    public static function getAllowedTargets()
    {
        return array_merge(parent::getAllowedTargets(), array('tony_custom'));
    }

    protected function getDefaultTemplate()
    {
        return 'modules/Tony/PageDemo/page/tony_custom/body.tpl';
    }
}<?php
namespace XLite\Module\Tony\PageDemo\View\Page\Admin;
/**
* @ListChild (list="admin.center", zone="admin")
*/
class TonyCustom extends \XLite\View\AView
{
public static function getAllowedTargets()
{
return array_merge(parent::getAllowedTargets(), array('tony_custom'));
}
protected function getDefaultTemplate()
{
return 'modules/Tony/PageDemo/page/tony_custom/body.twig';
}
}As you can see this implementation has only few differences:
namespace XLite\Module\Tony\PageDemo\View\Page\Customer;namespace is a bit different;
/**
 * @ListChild (list="center")
*/We use this
@ListChilddirective in order to insert this viewer class into central area of customer area, instead of admin one;- 5.2.x and earlier
- 5.3.x
protected function getDefaultTemplate()
{
    return 'modules/Tony/PageDemo/page/tony_custom/body.tpl';
}protected function getDefaultTemplate()
{
return 'modules/Tony/PageDemo/page/tony_custom/body.twig';
}The template for this viewer sits in other location. Aside from that, the implementation is the same.
Finally, we need to create the template mentioned in the
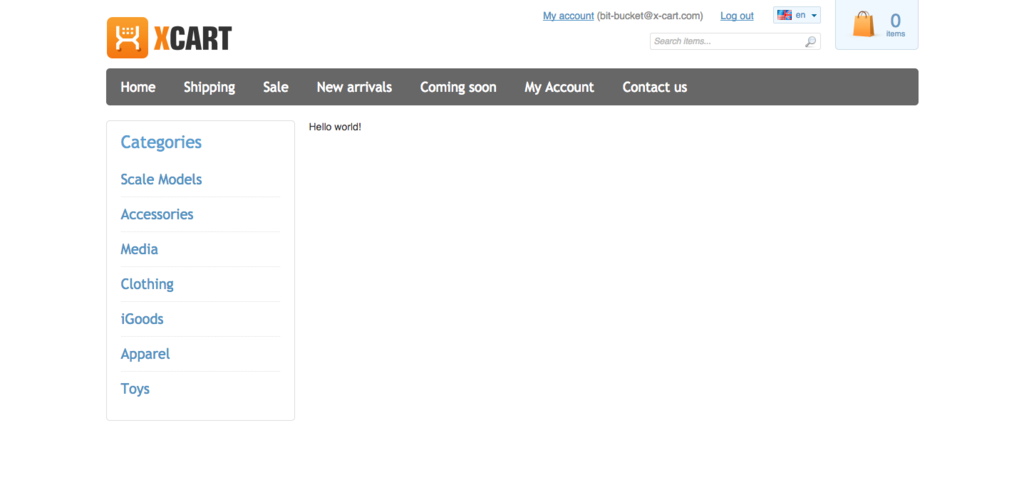
getDefaultTemplate()method. We create theskins/customer/modules/Tony/PageDemo/page/tony_custom/body.twig(skins/default/en/modules/Tony/PageDemo/page/tony_custom/body.tplfor 5.2.x and earlier) template (notice, that we create this template in theskins/customer/directory, instead ofskins/admin/one – it is so, because this template will be displayed in customer store-front) with Hello world! content.Re-deploy the store and open the
cart.php?target=tony_custompage after that. You will see the following result:
Module pack
- For X-Cart 5.2.x and earlier: Tony-PageDemo-v5_1_0.tar
- For X-Cart 5.3.x and later: Tony-PageDemo-v5_3_0.tar