Introduction
Sometimes developers [create complex entities" refwmExvPDD %} that require a separate page for editing its properties, instead of doing it via [ItemsList](/5.4/basics/creating_new_entity--_introduction_of_editable_itemslist_in_admin_area). This article explains how you can create a page where you can edit a model. For the sake of example, we will be editing product, but the same principles apply to all other entities as well.
You might want to see another way of creating such page - New model editing implementation. This method utilizes the power of Symfony forms and Twig blocks and gives more control of how the form looks.
The approach of Symfony forms is used on product details page and on settings page. All other entity pages (category, user, order, etc) use the approach described in this article.
Preparation
We start with creating a simple module with developer ID XCExample and module ID ModelEditingDemo. Then, we create page admin.php?target=model_editing_demo in admin area. For that we create:
controller class
\XLite\Module\XCExample\ModelEditingDemo\Controller\Admin\ModelEditingDemowith the following content:<?php
// vim: set ts=4 sw=4 sts=4 et:
namespace XLite\Module\XCExample\ModelEditingDemo\Controller\Admin;
/**
* Product edit controller
*/
class ModelEditingDemo extends \XLite\Controller\Admin\AAdmin
{}page viewer class
\XLite\Module\XCExample\ModelEditingDemo\View\Page\Admin\ModelEditingDemowith the following content:<?php
namespace XLite\Module\XCExample\ModelEditingDemo\View\Page\Admin;
/**
* Product edit page view
*
* @ListChild (list="admin.center", zone="admin")
*/
class ModelEditingDemo extends \XLite\View\AView
{
/**
* Return list of allowed targets
*
* @return array
*/
public static function getAllowedTargets()
{
return array_merge(parent::getAllowedTargets(), array('model_editing_demo'));
}
/**
* Return widget default template
*
* @return string
*/
protected function getDefaultTemplate()
{
return 'modules/XCExample/ModelEditingDemo/page/model_editing_demo/body.twig';
}
}empty page template
skins/admin/modules/XCExample/ModelEditingDemo/page/model_editing_demo/body.twig.
Creating model editing widget
Model editing widget will be defined by the \XLite\Module\XCExample\ModelEditingDemo\View\Model\Product class as follows:
<?php

namespace XLite\Module\XCExample\ModelEditingDemo\View\Model;

class Product extends \XLite\View\Model\AModel
{
    protected $schemaDefault = array(
        'sku' => array(
            self::SCHEMA_CLASS    => 'XLite\View\FormField\Input\Text\SKU',
            self::SCHEMA_LABEL    => 'SKU',
            self::SCHEMA_REQUIRED => false,
        ),
        'name' => array(
            self::SCHEMA_CLASS    => 'XLite\View\FormField\Input\Text',
            self::SCHEMA_LABEL    => 'Product Name',
            self::SCHEMA_REQUIRED => true,
        ),
        'price' => array(
            self::SCHEMA_CLASS    => 'XLite\View\FormField\Input\Text\Price',
            self::SCHEMA_LABEL    => 'Price',
            self::SCHEMA_REQUIRED => false,
        ),
        'description' => array(
            self::SCHEMA_CLASS    => 'XLite\View\FormField\Textarea\Advanced',
            self::SCHEMA_LABEL    => 'Full description',
            self::SCHEMA_REQUIRED => false,
            \XLite\View\FormField\Textarea\Advanced::PARAM_STYLE => 'product-description',
        ),
    );

    public function getModelId()
    {
        return \XLite\Core\Request::getInstance()->product_id;
    }

    protected function getDefaultModelObject()
    {
        $model = $this->getModelId()
            ? \XLite\Core\Database::getRepo('XLite\Model\Product')->find($this->getModelId())
            : null;

        return $model ?: new \XLite\Model\Product;
    }

    protected function getFormClass()
    {
        return '\XLite\Module\XCExample\ModelEditingDemo\View\Form\Model\Product';
    }
}
Let us have a closer look at this implementation:
Our class extends an abstract implementation of model editing widget (
\XLite\View\Model\AModel):class Product extends \XLite\View\Model\AModelNext, we define what fields are displayed in this widget by defining
$schemaDefaultproperty:protected $schemaDefault = array(
'sku' => array(
self::SCHEMA_CLASS => 'XLite\View\FormField\Input\Text\SKU',
self::SCHEMA_LABEL => 'SKU',
self::SCHEMA_REQUIRED => false,
),
'name' => array(
self::SCHEMA_CLASS => 'XLite\View\FormField\Input\Text',
self::SCHEMA_LABEL => 'Product Name',
self::SCHEMA_REQUIRED => true,
),
'price' => array(
self::SCHEMA_CLASS => 'XLite\View\FormField\Input\Text\Price',
self::SCHEMA_LABEL => 'Price',
self::SCHEMA_REQUIRED => false,
),
'description' => array(
self::SCHEMA_CLASS => 'XLite\View\FormField\Textarea\Advanced',
self::SCHEMA_LABEL => 'Full description',
self::SCHEMA_REQUIRED => false,
\XLite\View\FormField\Textarea\Advanced::PARAM_STYLE => 'product-description',
),
);This property is an array. Key is the name of Model's property that will be defined in this widget. In our case, they are sku, name, price and description. Value is an array of parameters that define this field. There are three main parameters:
self::SCHEMA_CLASSdefines a FormField class that will represent this field;self::SCHEMA_LABELdefines a label next to model's property field;self::SCHEMA_REQUIREDdefines whether this field must be filled in or it can be empty.
Construction like
\XLite\View\FormField\Textarea\Advanced::PARAM_STYLE => 'product-description'defines additional parameters of current field's FormField class.After that, we implement the
getDefaultModelObject()method that defines initial values in fields of our widget:public function getModelId()
{
return \XLite\Core\Request::getInstance()->product_id;
}
protected function getDefaultModelObject()
{
$model = $this->getModelId()
? \XLite\Core\Database::getRepo('XLite\Model\Product')->find($this->getModelId())
: null;
return $model ?: new \XLite\Model\Product;
}The properties of an object returned by
getDefaultModelObject()method are put into widget's form as default values. In thegetDefaultModelObject()method we just [pull \XLite\Model\Product object" ref_L1zWfWvw %} based on the product_id parameter from the request. If there is no product_id parameter in the request –\XLite\Core\Request::getInstance()->product_id returnsfalse– we assume that we are going to create a new product, not edit existing one, that is why we create empty\XLite\Model\Productobject and return that.Finally, we implement the
getFormClass()method that defines a form around our widget:protected function getFormClass()
{
return '\XLite\Module\XCExample\ModelEditingDemo\View\Form\Model\Product';
}
Now we need to create this \XLite\Module\XCExample\ModelEditingDemo\View\Form\Model\Product class returned by the getFormClass() method as it does not exist yet. For that, we create the
classes/XLite/Module/XCExample/ModelEditingDemo/View/Form/Model/Product.php file with the following content:
<?php

namespace XLite\Module\XCExample\ModelEditingDemo\View\Form\Model;

class Product extends \XLite\View\Form\AForm
{
    protected function getDefaultTarget()
    {
        return 'model_editing_demo';
    }

    protected function getDefaultAction()
    {
        return 'update';
    }

    protected function getDefaultParams()
    {
        return array(
            'product_id' => \XLite\Core\Request::getInstance()->product_id,
        );
    }
}
getDefaultTarget()method defines target field of the form, which represents where this form will be submitted. In our case, the request will be submitted toadmin.php?model_editing_demopage;getDefaultAction()method defines a value of<input type="hidden" name="action" value="" />element in the form. This param will be used in order to allow controller run proper doAction method that will handle data submitted. Of course, we will have to add corresponding method (doActionUpdate()in our case) to the controller class and we will do it a bit later.getDefaultParams()method defines an array of additional parameters that will be added to the form as<input type="hidden" name="key-on-an-array" value="value-of-an-array" />elements. In our case, we add<input type="hidden" name="product_id" value="product-id-from-request" />element, so that we would knew what product we are editing.
Now we are good with the model editing widget and we need to add it to the page template. We go to the skins/admin/modules/XCExample/ModelEditingDemo/page/model_editing_demo/body.twig template and define its content as follows:
{{ widget('\\XLite\\Module\\XCExample\\ModelEditingDemo\\View\\Model\\Product') }}
Adjusting controller
Finally, we have to adjust our \XLite\Module\XCExample\ModelEditingDemo\Controller\Admin\ModelEditingDemo controller class in order to properly process requests for saving product model and implement aforementioned doActionUpdate() method. We go to the classes/XLite/Module/XCExample/ModelEditingDemo/Controller/Admin/ModelEditingDemo.php file and define its content as follows:
<?php

namespace XLite\Module\XCExample\ModelEditingDemo\Controller\Admin;

/**
 * Product edit controller
 */
class ModelEditingDemo extends \XLite\Controller\Admin\AAdmin
{
    protected $params = array('target', 'product_id');

    protected function getModelFormClass()
    {
        return 'XLite\Module\XCExample\ModelEditingDemo\View\Model\Product';
    }

    protected function doActionUpdate()
    {
        $this->getModelForm()->performAction('modify');

        if ($this->getProductId() === 0) {
            $this->setReturnURL(
                $this->buildURL(
                    'model_editing_demo',
                    '',
                    array('product_id' => $this->getModelForm()->getModelObject()->getId())
                )
            );
        }
    }

    public function getProductId()
    {
        return \XLite\Core\Request::getInstance()->product_id ?: 0;
    }
}
We define
$paramsproperty as:protected $params = array('target', 'product_id');and it will tell controller class that only target and product_id parameters can be accepted.
getModelFormClass()method returns the model editing widget's class. In our case, it isXLite\Module\XCExample\ModelEditingDemo\View\Model\Productone.doActionUpdate()method defines a routine that will be run after we submit a form. The main processing happens in this line:$this->getModelForm()->performAction('modify');Essentially, it says, take submitted info from the submitted form and save it to the database.
getModelForm()method returns a model object (\XLite\Model\Productin our case),performAction('modify')method fills it in with updated values and then saves the result into the database.After we processed submitted form, we need to properly redirect merchant to the page of current product, that is why we pull product ID from the request (
$this->getModelForm()->getModelObject()->getId()) and redirect customer toadmin.php?target=model_editing_demo&product_id=IDpage like this:$this->setReturnURL(
$this->buildURL(
'model_editing_demo',
'',
array('product_id' => $this->getModelForm()->getModelObject()->getId())
)
);
Checking the results and module pack
We are done with this mod. To check the result, open the admin.php?target=model_editing_demo page. You should see the result like this:
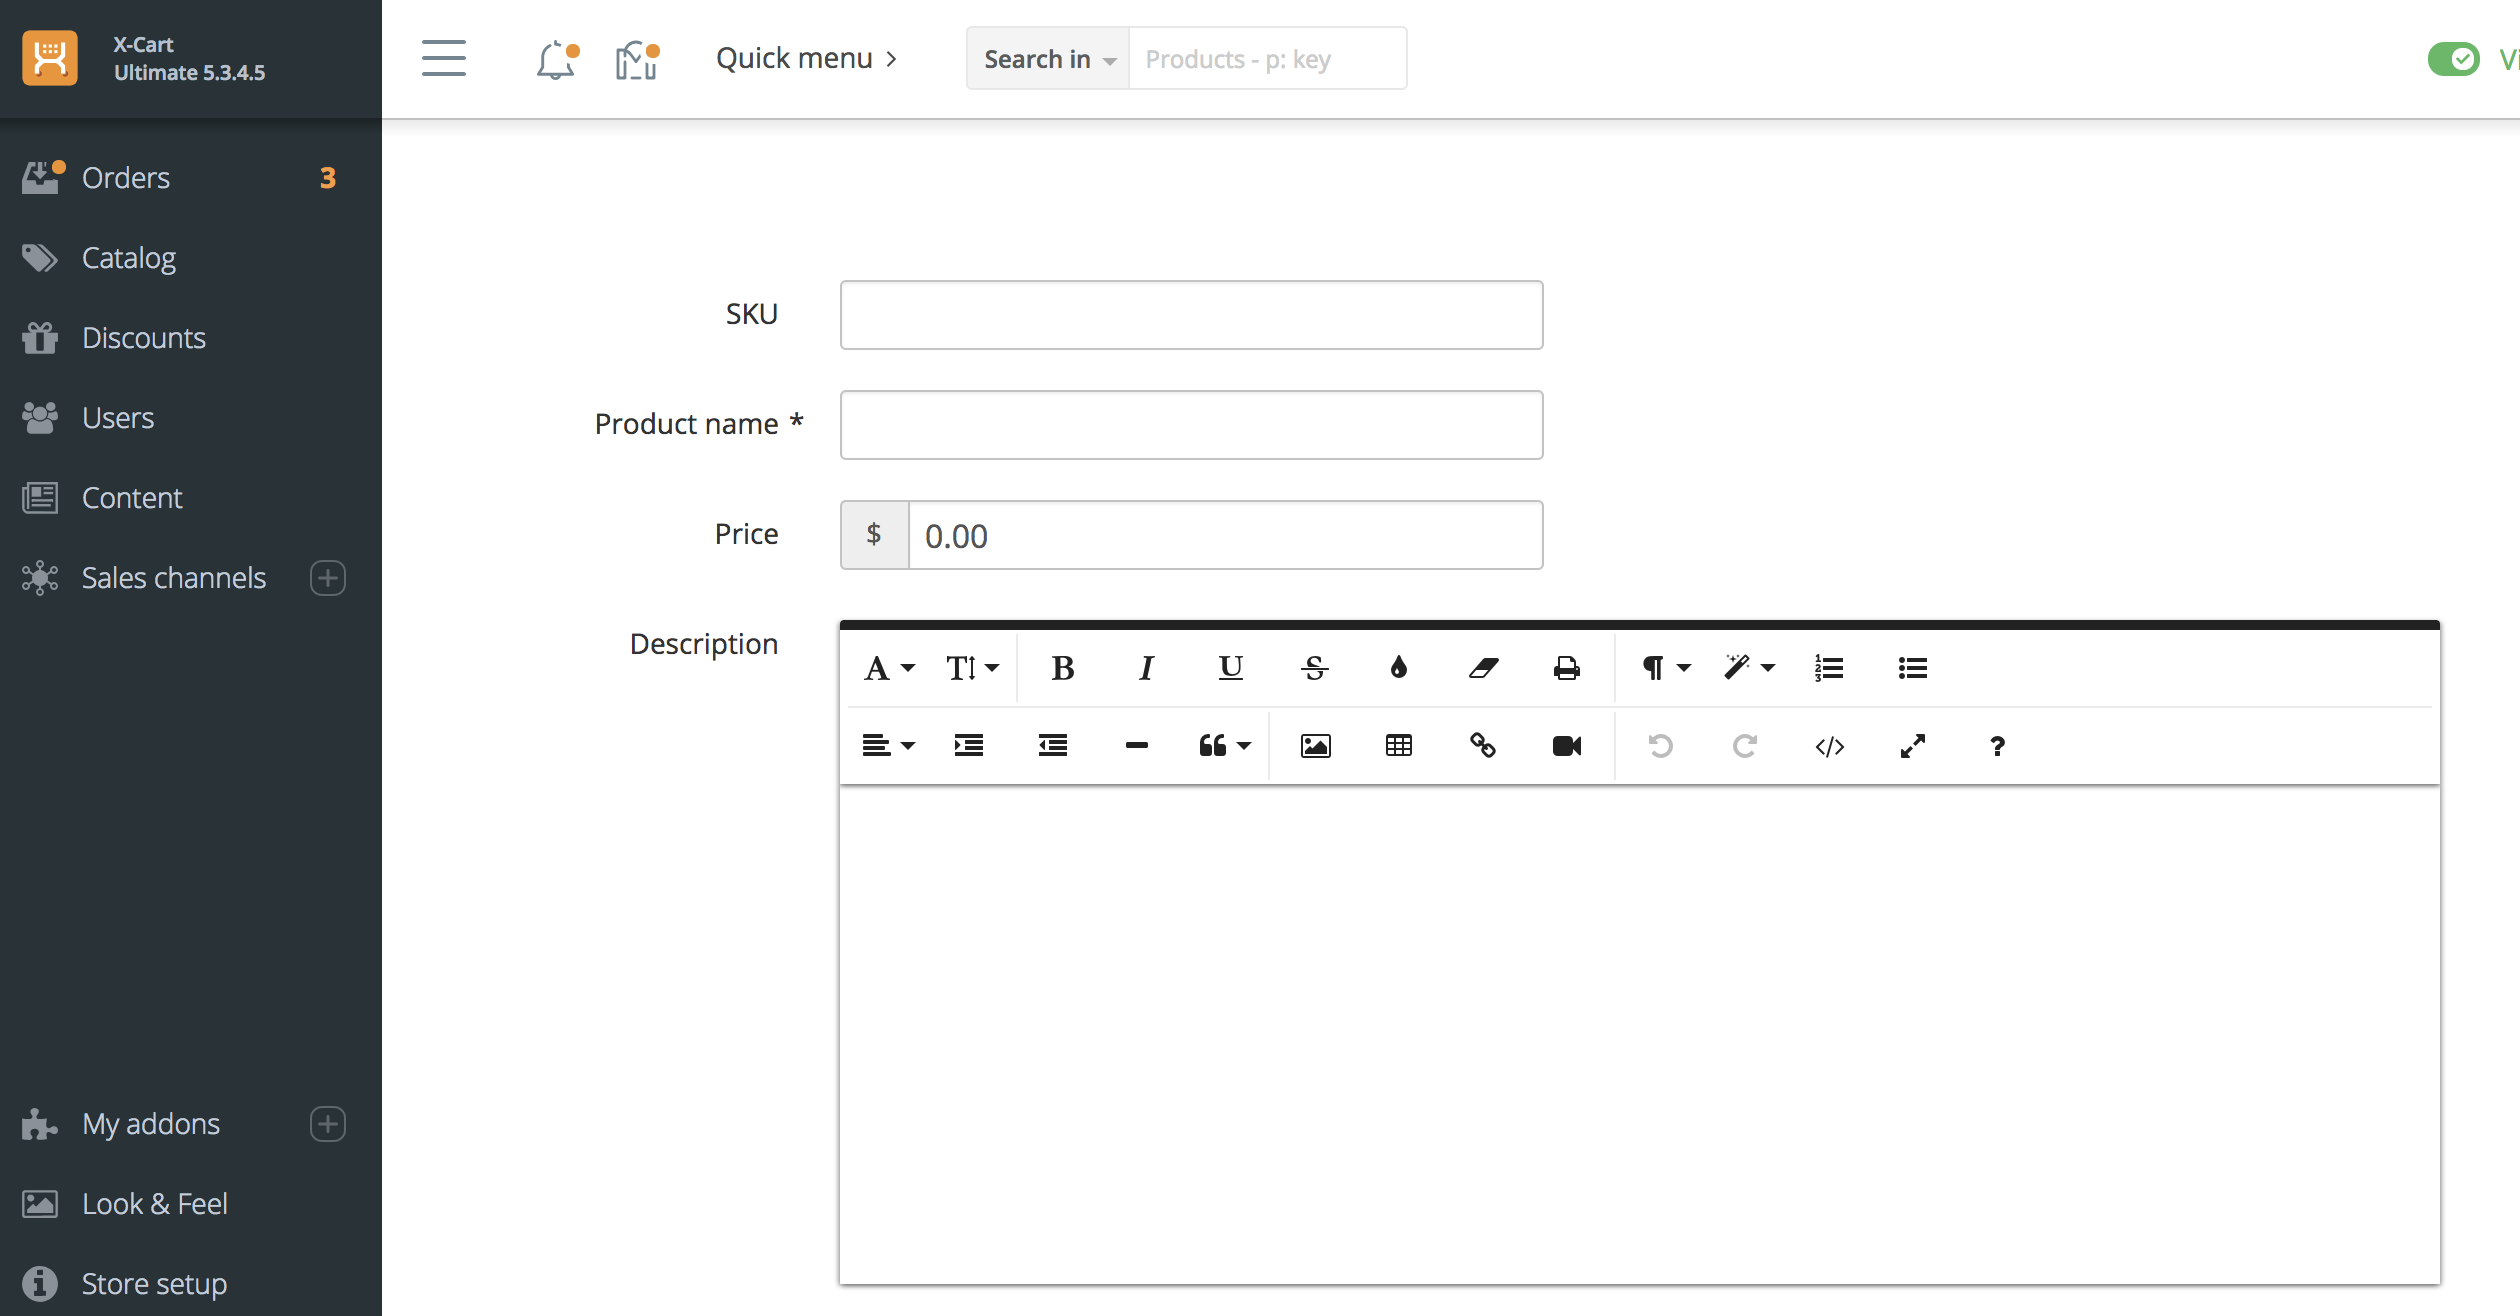
If you fill this form in and submit it, you will create a new product.
If you open admin.php?target=model_editing_demo&product_id=10 page, then you will see the following result (assuming product with ID 10 does exist in the database):
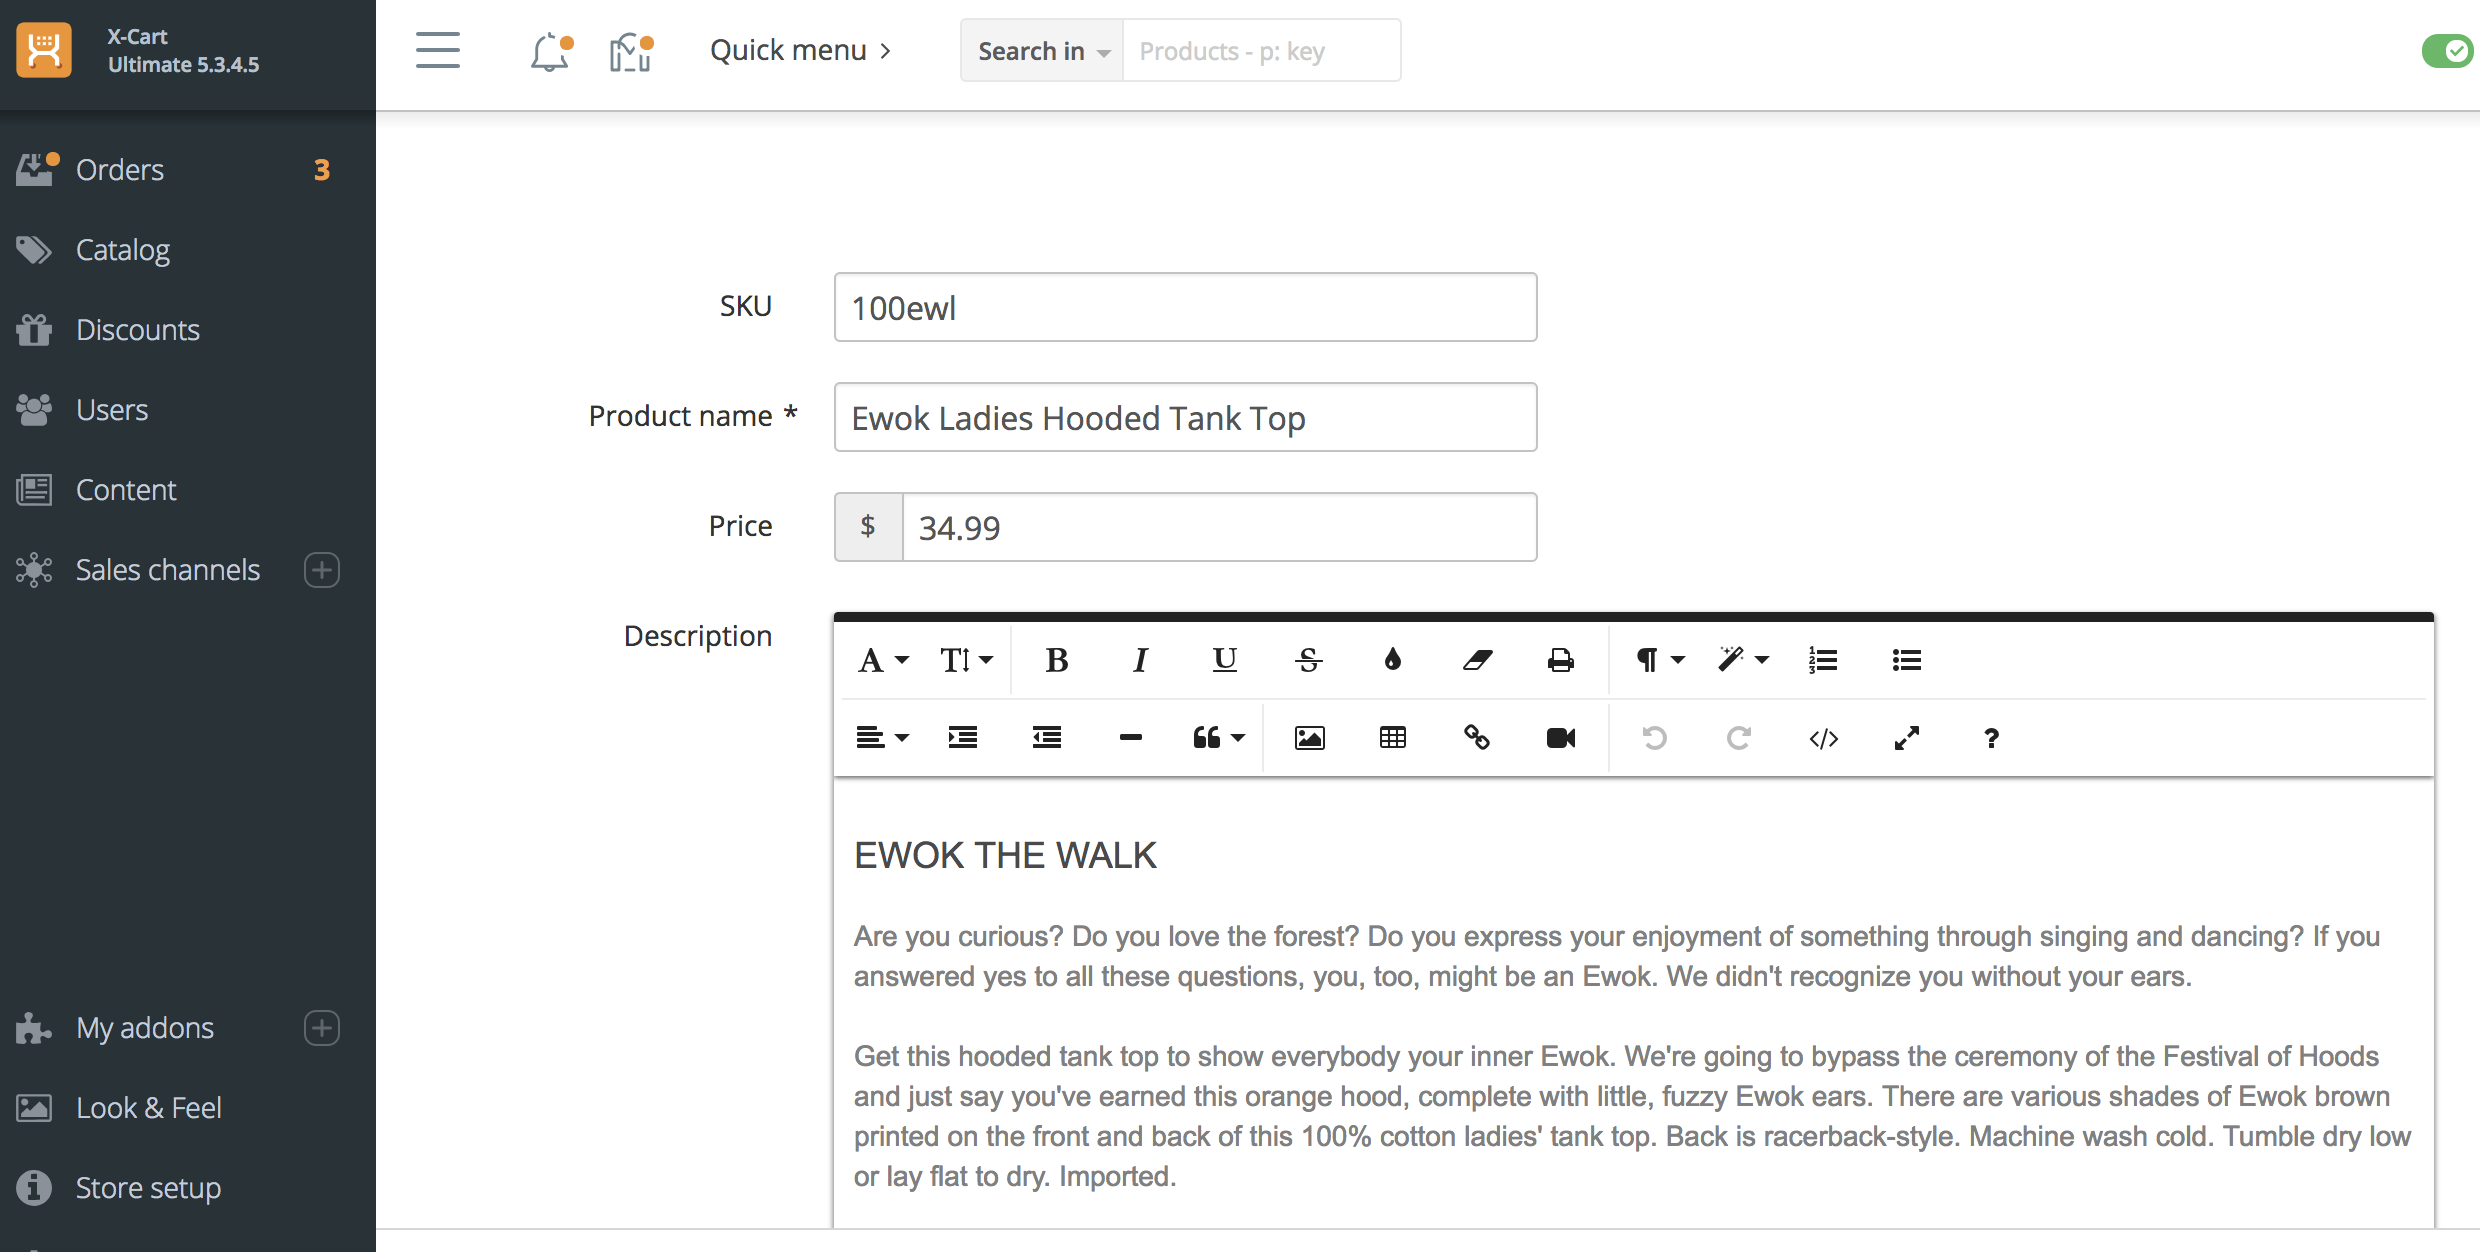
As you can see, X-Cart picked up properties of the product and you can edit it via this form.
You can download this module example from here: XCExample-ModelEditingDemo-v5_3_0.tar