Introduction
This article explains how to use image selection widget in X-Cart. And also, how to attach images to an entity.
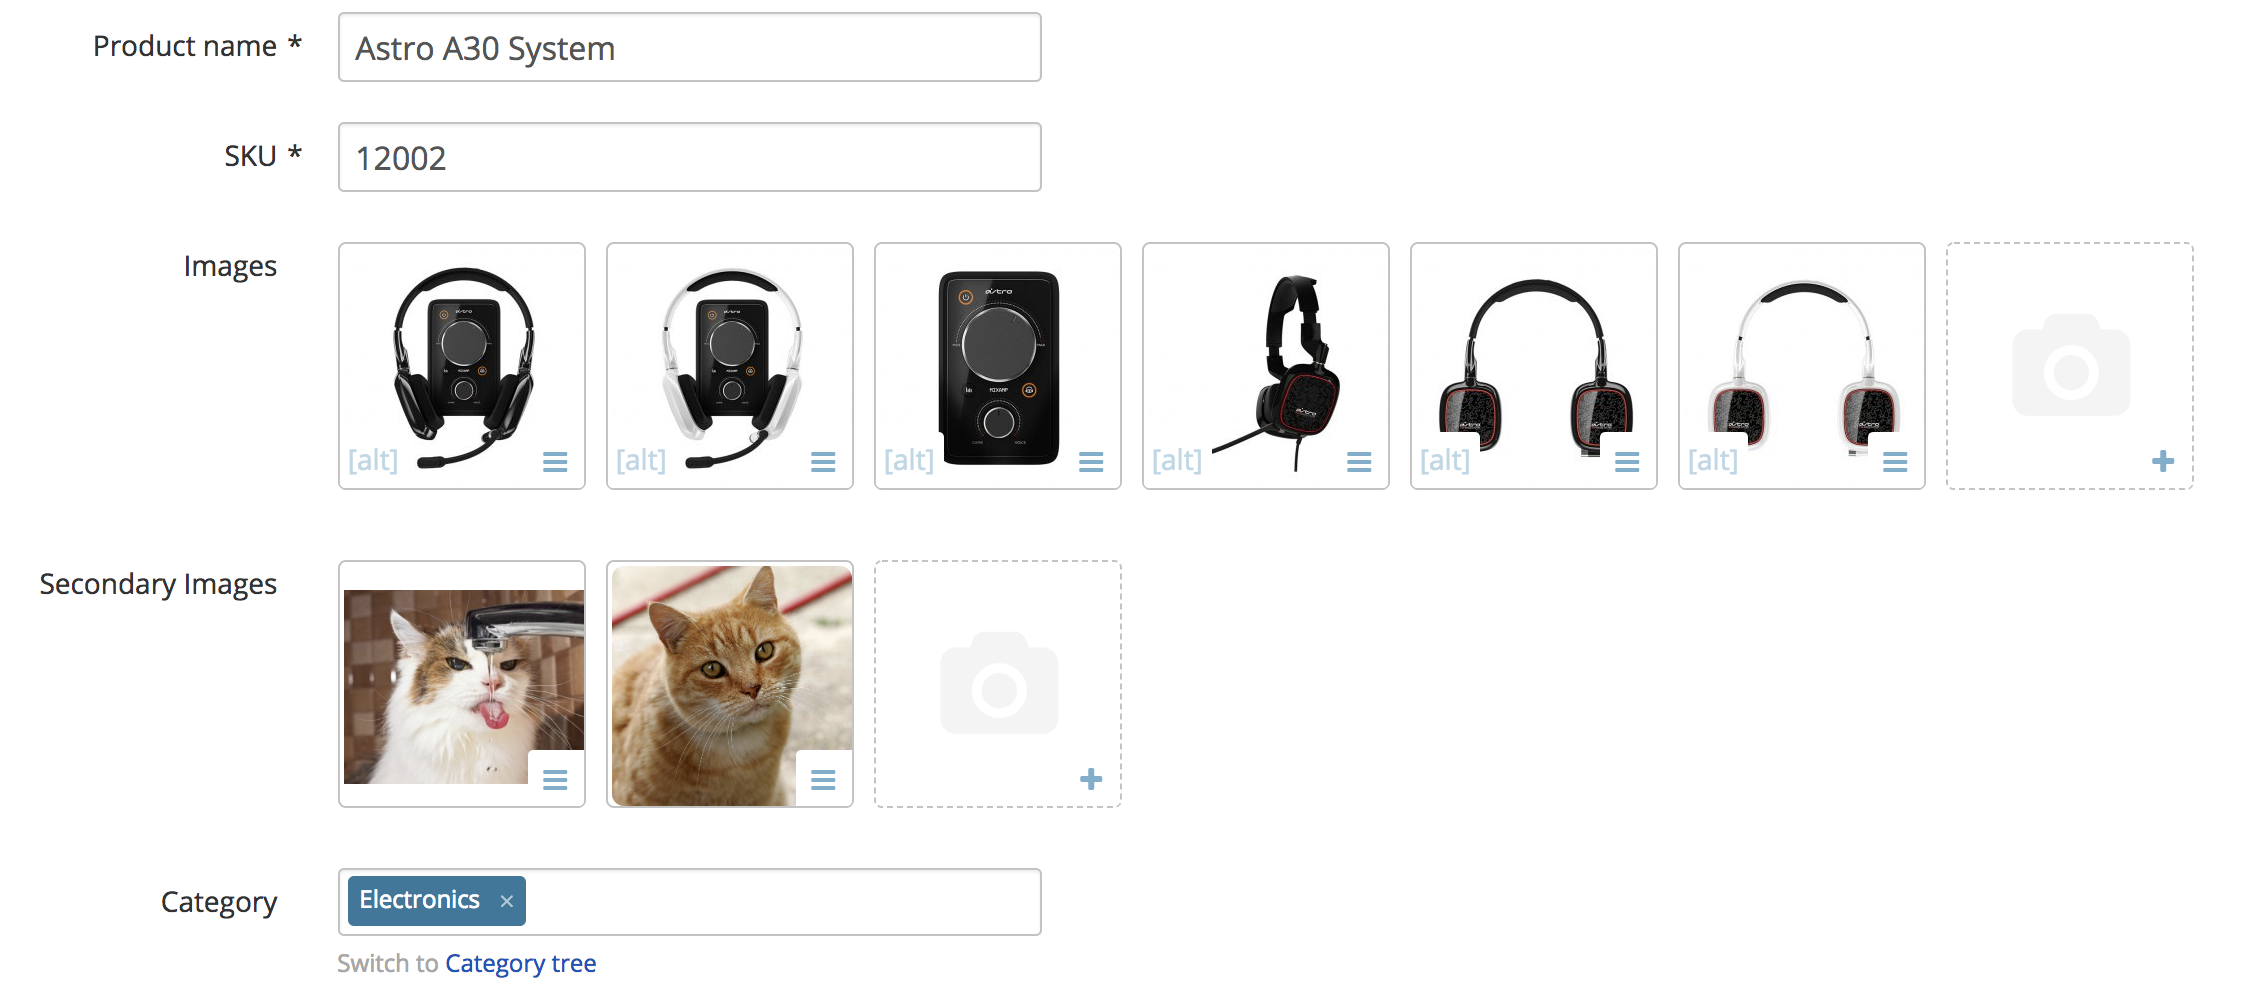
For the sake of example, we will create a mod that adds 'Secondary images' field to a product. Merchant will be able to assign any number of secondary images to a product and these images will be shown on product details page in customer area.
Implementation
Creating an empty module
First of all, we create an empty module with developer ID XCExample and module ID ImageWidgetDemo.
Decorating Product class
Inside this module, we decorate the \XLite\Model\Product class as we want to add a new property secondaryImages to it:
<?php
// vim: set ts=4 sw=4 sts=4 et:

namespace XLite\Module\XCExample\ImageWidgetDemo\Model;

abstract class Product extends \XLite\Model\Product implements \XLite\Base\IDecorator
{
    /**
     * @OneToMany (targetEntity="XLite\Module\XCExample\ImageWidgetDemo\Model\Image\Product\SecondaryImage", mappedBy="product", cascade={"all"})
     * @OrderBy   ({"orderby" = "ASC"})
     */
    protected $secondaryImages;

    public function __construct(array $data = array())
    {
        parent::__construct($data);

        $this->secondaryImages = new \Doctrine\Common\Collections\ArrayCollection();
    }

    public function getSecondaryImages()
    {
        return $this->secondaryImages;
    }

    public function addSecondaryImages($image)
    {
        $this->secondaryImages[] = $image;
        return $this;
    }
}
Let us have a closer look at this implementation.
We add a new property to a product object:
/**
 * @OneToMany (targetEntity="XLite\Module\XCExample\ImageWidgetDemo\Model\Image\Product\SecondaryImage", mappedBy="product", cascade={"all"})
 * @OrderBy   ({"orderby" = "ASC"})
 */
protected $secondaryImages;We define it as
OneToMany, which means that one product can have many secondary images, while a secondary image always belongs to a single product.@OneToManyThe secondary image object is defined by the
\XLite\Module\XCExample\ImageWidgetDemo\Model\Image\Product\SecondaryImageclass:targetEntity="XLite\Module\XCExample\ImageWidgetDemo\Model\Image\Product\SecondaryImage"This class does not exist yet, so we will have to create it as a next step. Then, we specify that each record about SecondaryImage object must contain a reference to its product object:
mappedBy="product"Learn more about mappedBy in Doctrine documentation. Also, using
mappedBydirective in Product class means that we will have to useinversedBydirective in SecondaryImage class in order to create bidirectional relation. This way we will be able to access SecondaryImage object from Product object$product->getSecondaryImages()as well as access Product object from SecondaryImage object$secondaryImage->getProduct().This
cascadedirective defines that SecondaryImage objects are associated with its Product object and if we remove or clone Product entity, the same will happen to SecondaryImage objects linked to it. Learn more about cascade in Doctrine documentation.cascade={"all"}The
@OrderBydirective means that SecondaryImage objects will be ordered by SecondaryImage'sorderbyfield.@OrderBy ({"orderby" = "ASC"})We also change constructor method a bit:
public function __construct(array $data = array())
{
    parent::__construct($data);

    $this->secondaryImages = new \Doctrine\Common\Collections\ArrayCollection();
}and tell Product class that
secondaryImagesproperty is an array.Finally, we add getter/setter methods:
public function getSecondaryImages()
{
    return $this->secondaryImages;
}

public function addSecondaryImages($image)
{
    $this->secondaryImages[] = $image;
    return $this;
}
Creating SecondaryImage class
We create the classes/XLite/Module/XCExample/ImageWidgetDemo/Model/Image/Product/SecondaryImage.php file with the following content:
<?php
// vim: set ts=4 sw=4 sts=4 et:

namespace XLite\Module\XCExample\ImageWidgetDemo\Model\Image\Product;

/**
 * @Entity
 * @Table  (name="product_secondary_images")
 */
class SecondaryImage extends \XLite\Model\Base\Image
{
    /**
     * @Column (type="integer")
     */
    protected $orderby = 0;

    /**
     * @ManyToOne  (targetEntity="\XLite\Model\Product", inversedBy="secondary_images")
     * @JoinColumn (name="product_id", referencedColumnName="product_id")
     */
    protected $product;

    /**
     * @Column (type="string", length=255)
     */
    protected $alt = '';
}
Let us have a look at each important moment of this SecondaryImage class:
The directive:
@Entitymeans that this class defines a new entity.
We define the name of the table where info about these objects will be stored:
@Table (name="product_secondary_images")In our case, this table will be 'xc_product_secondary_images', assuming you have not changed table prefix in config.
We create our
SecondaryImageclass based on standard\XLite\Model\Base\Imageimage class:class SecondaryImage extends \XLite\Model\Base\ImageOur image class will have three additional properties:
$orderbyfield for sorting,$productproperty as a link to parent product's object and$altfield that will define a text for HTML's 'alt' property.Implementation of
$orderbyand$altproperties is quite straight-forwart, while$productis more complex:/**
* @ManyToOne (targetEntity="\XLite\Model\Product", inversedBy="secondaryImages")
* @JoinColumn (name="product_id", referencedColumnName="product_id")
*/We create a backward relation to
\XLite\Model\Productclass similar to$secondaryImagesproperty in\XLite\Module\XCExample\ImageWidgetDemo\Model\Productclass.We define
$productproperty as@ManyToOne, because one secondary image can be assigned to one and only one product, while a product can have multiple secondary images assigned. Then we link$productproperty to$secondaryImagesproperty of the\XLite\Model\Productclass:@ManyToOne (targetEntity="\XLite\Model\Product", inversedBy="secondaryImages")We also specify that MySQL table, where secondary images are stored must contain the
product_idcolumn with value of parent image's ID in order to create this relation:@JoinColumn (name="product_id", referencedColumnName="product_id")Now it is time to create the repository class that will handled requests to database about SecondaryImage objects. We create the
classes/XLite/Module/XCExample/ImageWidgetDemo/Model/Repo/Image/Product/SecondaryImage.phpfile with the following content:<?php
// vim: set ts=4 sw=4 sts=4 et:
namespace XLite\Module\XCExample\ImageWidgetDemo\Model\Repo\Image\Product;
class SecondaryImage extends \XLite\Model\Repo\Base\Image
{
/**
* Returns the name of the directory within '<X-Cart>/images' where images are stored
*/
public function getStorageName()
{
    return 'product_secondary';
}
}We extend the standard
\XLite\Model\Repo\Base\Imagerepository class and use it as a template:class SecondaryImage extends \XLite\Model\Repo\Base\ImageWe also define that secondary image files will be stored in
<X-Cart>/images/product_secondary/directory:public function getStorageName()
{
return 'product_secondary';
}We are done with creating SecondaryImage entity.
Tweaking design of admin and customer interfaces
First, we need to allow merchant to upload secondary images for a product on product details page in admin area. There is a guide explaining how to add new property to product.
Basic plan to this task is:
- change DTO class
\XLite\Model\DTO\Product\Info; - change
\XLite\View\FormModel\Product\Infoclass that renders product details form.
We decorate \XLite\Model\DTO\Product\Info class, so we create the classes/XLite/Module/XCExample/ImageWidgetDemo/Model/DTO/Product/Info.php file with the following content:
<?php
// vim: set ts=4 sw=4 sts=4 et:

namespace XLite\Module\XCExample\ImageWidgetDemo\Model\DTO\Product;

/**
 * Abstract widget
 */
abstract class Info extends \XLite\Model\DTO\Product\Info implements \XLite\Base\IDecorator
{
    protected function init($object)
    {
        parent::init($object);

        $secondaryImages = $object->getSecondaryImages();

        $dtoImages = [
            0 => [
                'delete'   => false,
                'position' => '',
                'alt'      => '',
                'temp_id'  => '',
            ]
        ];

        foreach ($secondaryImages as $image) {
            $dtoImages[$image->getId()] = [
                'delete'   => false,
                'position' => '',
                'alt'      => '',
                'temp_id'  => '',
            ];
        }

        $this->default->secondary_images = $dtoImages;
    }

    public function populateTo($object, $rawData = null)
    {
        parent::populateTo($object, $rawData);

        $object->processFiles('secondaryImages', $this->default->secondary_images);
    }
}
We implement two methods in this class:
init()is used to populate data-transfer object (DTO) with secondary images' data;populateTo()is used to apply changes to product object based on submitted data. In this case, all needed routines for handling images are defined inprocessFiles()method, so we just call it with first parameter as name of our product's property (secondaryImages) and with second parameter as data submitted in the form ($this->default->secondary_images).
Now we should apply changes to our product details' form. We decorate \XLite\View\FormModel\Product\Info class and create the classes/XLite/Module/XCExample/ImageWidgetDemo/View/FormModel/Product/Info.php file with the following content:
<?php
// vim: set ts=4 sw=4 sts=4 et:

namespace XLite\Module\XCExample\ImageWidgetDemo\View\FormModel\Product;

/**
 * Product form model
 */
abstract class Info extends \XLite\View\FormModel\Product\Info implements \XLite\Base\IDecorator
{
    protected function defineFields()
    {
        $schema = parent::defineFields();

        $product = \XLite\Core\Database::getRepo('XLite\Model\Product')->find($this->getDataObject()->default->identity);

        $secondaryImages = [];

        if ($product) {
            $secondaryImages = $product->getSecondaryImages();
        }

        $schema[self::SECTION_DEFAULT]['secondary_images'] = [
            'label'        => static::t('Secondary Images'),
            'type'         => 'XLite\View\FormModel\Type\UploaderType',
            'imageClass'   => 'XLite\Module\XCExample\ImageWidgetDemo\Model\Image\Product\SecondaryImage',
            'files'        => $secondaryImages,
            'multiple'     => true,
            'position'     => 350,
        ];

        return $schema;
    }
}
Essentially, we only have one defineFields() method here and inside it we define our 'secondary_images' field as follows:
$schema[self::SECTION_DEFAULT]['secondary_images'] = [
    'label'        => static::t('Secondary Images'),
    'type'         => 'XLite\View\FormModel\Type\UploaderType',
    'imageClass'   => 'XLite\Module\XCExample\ImageWidgetDemo\Model\Image\Product\SecondaryImage',
    'files'        => $secondaryImages,
    'multiple'     => true,
    'position'     => 350,
];
- label of this field is 'Secondary Images';
- widget used for rendering this field is
\XLite\View\FormModel\Type\UploaderType; - this widget will work with images of
\XLite\Module\XCExample\ImageWidgetDemo\Model\Image\Product\SecondaryImageclass; - existing secondary images are passed into 'files' parameter;
- this widget allows to specify multiple images for a product, not a single one (
'multiple' => true).
Besides that, we need to display secondary images in store-front. For that we create a template that will be shown on product details page. We create
skins/customer/modules/XCExample/ImageWidgetsDemo/product/details/secondary-images.twig template with the following content:
{##
 # @ListChild (list="product.details.page", weight="80")
 #}

<div>
    <h2>Secondary images</h2>
    <div>
    {% for image in this.getProduct().getSecondaryImages() %}
        {{ widget('\\XLite\\View\\Image', image=image, maxWidth=200, maxHeight=200) }}
    {% endfor %}
    </div>
</div>
In this template, we go through each secondary image object and then call {{ widget('\\XLite\\View\\Image', image=image }} operator in order to build proper HTML code for displaying this image. This widget also performs on-fly resizing of an image, if needed.
Checking the results
Now we can check the results of our module's work. First we go to a product details page in admin area and try to add secondary images:

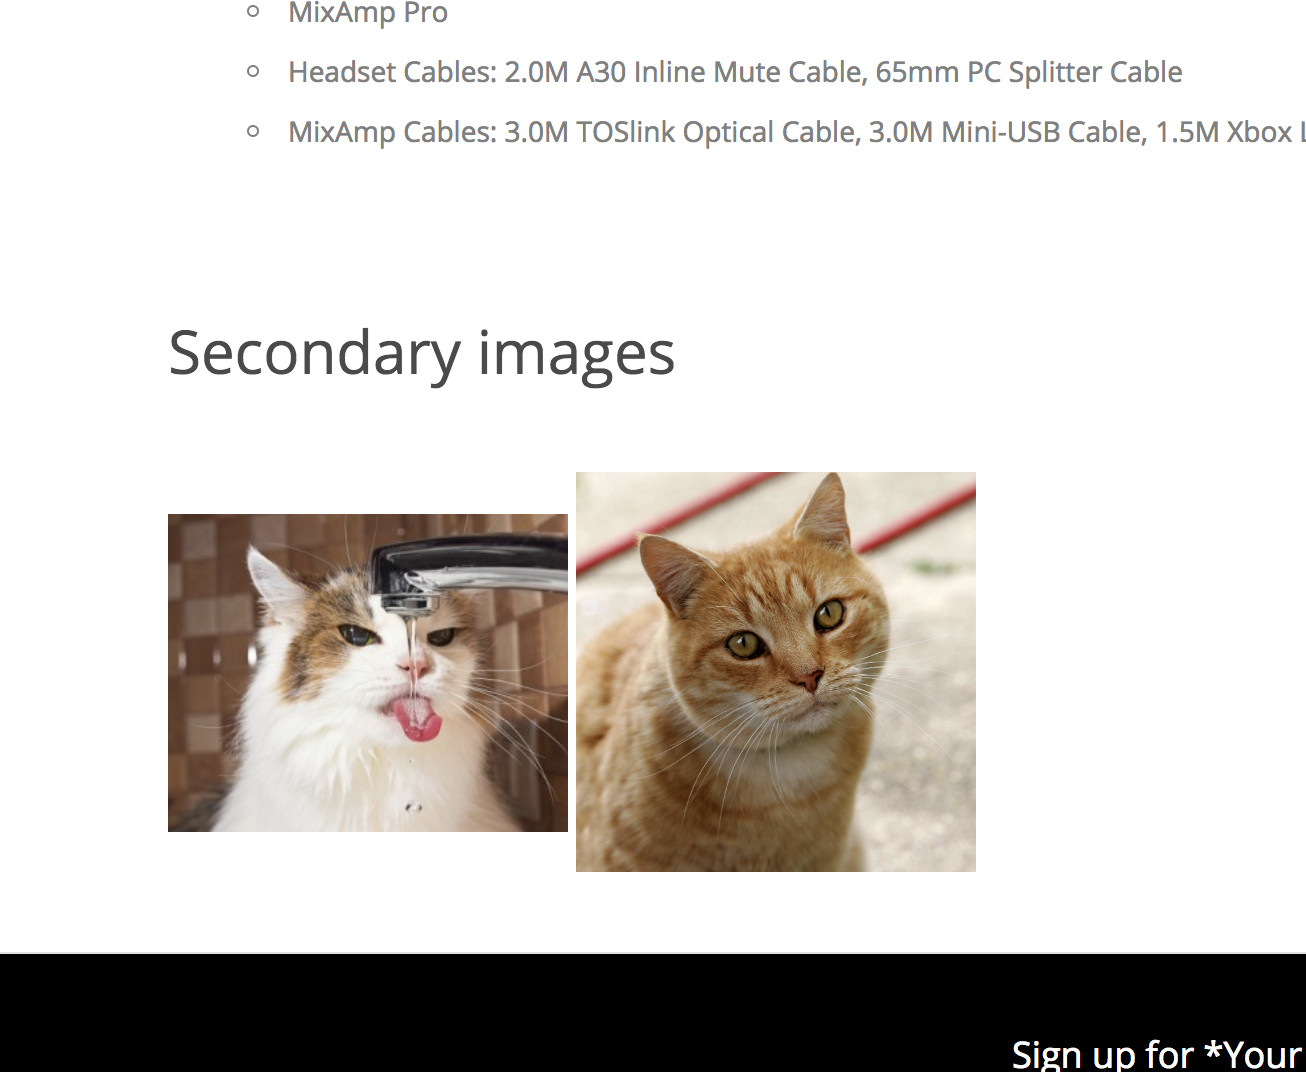
After we save the changes, go to this product details page in customer zone and you should see the following result:

Module pack
You can download the pack of this module from here: XCExample-ImageWidgetDemo-v5_3_0.tar